Wednesday, June 27, 2012

Camper Construction

When building these campers, the T-shaped floor frame was made first, then the under belly skin was attached.  After this, the plywood floor was attached and screwed down to the frame with countersunk machine screws with clutch bit heads.  While we removed every screw we could, there most of the screws in the floor are still in place.  The floor had more moisture and the screw heads are all rusted and filled with "stuff".

The reverse corner pieces that include the "wings" on either side were attached next with screws from underneath.  Then the curved corner pieces were attached to cover up the corners. This is a problem for me because these screws towards the back of the wings, are not accessible from the head side unless all the curved corner aluminum is removed.  I don't want to do that.

The reason this is a problem for me now, is because I want to replace the entire plywood floor. That means the ladder frame on each side of the camper must be lifted up slightly to get the old plywood out and the new material in.

 I first thought I'd just piece in some plywood and keep most of the floor, but there is a bit of rot farther forward on the port side.    While I am all in favor of reducing work, it seems pointless to me to leave a somewhat soft plywood floor in the camper after removing so much other rot. 

I also discovered that fiberglass bat type insulation was used in the floor.  Which might explain some of the water damage.  I'd like to replace that with foam, and surprise my foam order arrived today.

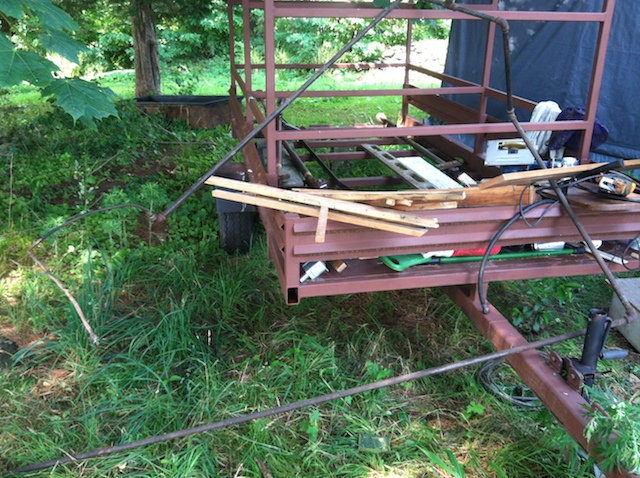
Marco and I removed as much of the rotten wood floor from the back of the camper as possible today.  I scraped away as much of the spray foam insulation as needed to make the screw heads visible from the top.  The one we can't reach will have to be cut off some other way.

Another obstacle is my clutch bits are worn out.  I lost one and the other has become quite rounded off.  I ordered a new set of 10 off eBay, but have not received them yet.

So further work on the camper is on hold.  I will be busy launching a boat tomorrow, and I have a bit of wiring to do on before launching. 

My plan for the floor is to removed the old floor, placing a temporary floor in place, while removing any other bits of screws that need to come out.  Fortunately with aluminum framing, all it takes is to work the screw from side to side a bit and the hole loosens up and any screw can be backed out unless it breaks off flush.

I will need to replace some rivets around the bottom sides and front.  Next some spray foam will seal that up.  When my Acryl-R comes in, I can fill the seams on the outside also.

So what to do about floor material?  I am thinking about fiberglass panels for all the horizontal surfaces. I'd use thinner pieces for the two wings and the bed area above the cab.  For the floor, I will have to do it in sections and the area under the wings will need to be the same thickness as the original plywood.   I can fit two or three smaller sections in and can grind a bevel in them and fiberglass them together. 

Fiberglass panels make for a good choice for lots of reasons.

  1. They never rot. Water has no effect on these panels.  The only issue is to install a drain(s) to get rid of spilled water, or to have a mop handy for spills.
  2. Depending on the thickness, they will have no deflection and hold the bottom of the camper rigid spreading the loads out more.  A thinner panel might have some deflection, but if supported by high density foam, that will mitigate that somewhat.
  3. The propane area has a door which allows water in.  This area was badly rotted.  Also that compartment holds the battery, the vapors of which cause damage.  So a strong fiberglass panel makes sense in an area that is more exposed to the elements.
  4. They are nearly as hard as steel.  These panels are a it hard to work with as they dull tool quickly.  I may use this material for the supports for the jack points as well.  I feel that the jack points are weak if they are made of wood and get wet.  The key is to spread the load over a greater area and to use a material that will last forever.
Disadvantages is they are heavier and harder to work with.

Jack Points Part II

Port Side Aft:  This was the problem area.  I beat the board out. It will need replacement and I'll need an aluminum skin patched.  My big question is how to I make this stronger so it holds up better?  Or should I just rebuild it as it was?  Advice anyone?  You can see I am also working on removing more of the floor. Ultimately, I plan to take it all out, and this is complicated by the fact the floor is sandwiched between two sets of aluminum framing.  Why did they build it like this.  This is the only issue I can complain about in the construction of this camper.


 Starboard Side Aft--CRACKED.  I will have to replace this also.

Starboard Side Forward--LOOKS GOOD!  The only one, unfortunately.

Port Side Forward Jack Point is crackewd.  I suppose I will replace this, after I test out my technique on the Port Side Aft Jack Point.


 Looks good?  NOT!  I was probing the floor and found a soft spot and that lead me to find this area where the wall is not secure.  At present I'm thinking about putting in a solid fiberglass floor.  It will be heavy, but it will never rot and I like that idea.  Getting it in will be difficult, but Then it should not have to be done again.  My idea is to use fiberglass panel wherever there is a horizontal surface for water protection.  I'd also like to have drains in all four corners.  It might make it nice for cleanup too.  I'll have to think a while before deciding on that.  Plywood is much cheaper.  And this stuff did last 45 years.


Skin is loose here, on the opposite side but not as bad, and in the front.  I will need some new rivets!

Monday, June 25, 2012

Avion Truck Camper? Almost as good as a Barth!

Hereare a few links to Avion Truck Camper Restorations.

THE ROAD TAKEN: What's Inside the Avion Truck Camper?

Avion C10 Restoration

Avion C11 Restoration

Wiring Photo's

This area above the window had a mouse nest.  I have to guess they used the area behind the flat vertical sheetmetal as a raceway to move around the camper.  I need to fill that in with foam.


 Front clearance lights under that foam.  I think the closed cell foam seals the wire splices as well. 

 This wire looks good to me.  All these years working on boats I expected to see corrosion.  This caper stayes pretty dry except for three areas.  Under the sink and around the plumbing, where teh roof failed, and near the windows up front there are a few signs that someone left a couple windows open--very minor really.

(Below) AC Shower power connection from the inside.  This goes to the box with two fuses in it.

Fuse Panel.  This needs to go.  And it's replacement needs to go somewhere accessible.

This is a cover plate on the outside, with a couple of duplex outlets under it I suppose. Yes there are two AC cables going across there.  Wire in forground is for kitchen sink light.  Extension cord is for temporary use.

This is adjacent to the front of the pickup bed.  AC wiring crossing over and one of these primary wires was to the compressor that pressurized the water tank.  I don't know what the other is for, unless to carry power elsewhere from here.  need to study that some more. 

The lower AC wiring went to the refrigerator and then on to some outlets I guess.


Water inlet port in the middle with the T.


This duplex outlet is in the back by the where the furnace was.

This is where the wire picks up from the other cut wires.  I did not remove this, Marco did.  I am a bit surprised the refridgerator was on the same circuit as these outlets.  Then again the service is through one extension cord--20 Amps max and most likely designed for 15 Amps. I need to check the gauge of wire being used for the AC wiring.

Underneath the rear view window in the front of the camper.

Finishing up crossing to the starboard outlets.


These opening are 13/16"--just a bit more than 3/4 of an inch.  A drill or file could open one to 7/8 easily enough.

Most of the wires seemed to have some plastic inserts to protect the wire from chafe.  I have not checked them all.

Ceiling detail for the front light fixtures.

Front fan area.  This fan actually has fan blades and it did work.  Both motors turned over but were a bit noisy IMHO.


Testing for Leaks

We had several major downpours here today. Even with the windows open, water only came in one place in the back where there was a lot of damage. So apparently the roof fix was not fixed completely.

The damaged area is right at the top of the ladder, reinforcing my opinion that walking on the roof contributed to the leak and subsequent damage.  Every place I looked that was sealed with closed cell foam was dry.

Next step is to try a hose. and locate the exact spots that is leaking, and to double check elsewhere for leaks.

I ordered two tubes of Acryl-R Aluminum sealant for the exterior. I don't think I really need it for moisture protection, but it seems like the prudent thing to do.

I order 200 Board Feet of closed cell foam.  I will begin insulating the areas as soon as my wiring update is done.

I still need to repair the jack mounts and pop out a few corner dents and learn how to repair these blind rivets. 

Water Leaks and Wiring Considerations

Aside from the one hole in the roof, the water damage I found in the camper was from the plumbing problems and from windows left open.  The inside was sprayed with closed cell foam, and I could not find any leaks around any windows except for a few cases where I assume the windows were left open.  Only in a few places was the foam separated from the skin--on the roof where walking on the roof would cause deflection.

I was planing on removing all the windows.  Now I will not; I think I'll leave them.  While I'd like to change the machine screws fastening them.  If it is not necessary, I'll do that later. One advantage to rusted screw heads is the camper looks old.  I like the idea of an old looking (on the outside) camper.  A new camper screams target, come break in. As much as I'd like a cleaner exterior, I'm leaving that alone for now.  These screws are rusted pretty badly on the heads.  Some of these won't come out without a fight. Better to leave them alone, IMHO.

The wiring is all done with primary wire (single conductor) and the ground was through the frame.  I found all the internal wiring worked when I bought the camper.  I did not test the running lights, but I have confidence the wiring for this is good also.

While it is good, I may want to change the wiring for maintainability. I plan to fill the cavities with foam, so to keep the wire somewhat accessible I need PVC conduit inside the 1" framing cutouts.  The existing cutouts are rather large and everywhere. Since I'll be using primary wire again with the frame providing the ground path, the conduit does not have to be all that large to snake plastic coated wire though the conduit.

I need to finish my wiring plan and I can start running some conduit.

Considerations:

Electric jack wiring
More AC outlets
Fans
Air Conditioning?  Or provide wiring for future upgrade
Solar Panel Wiring
Round two conductor wire for cable glands (passing through the exterior) electric jacks, external lights, solar panels.
Cable glands for antenna wiring
Stereo, Radio, Ham Radio, and TV.  (TV location where to put it?) Speakers
Video Camera's--For backing up, and outside surveillance.
LED lighting (recessed or not)
Strip lighting.
Night Lights--a few small single LEDs

This job is not looking so hard after all.  Once I get the wiring done, which I can do on a rainy day, I can add insulation and start to enclose the inside of the camper.

Jack Points

My friend Carlton, a welder came over and looked at my camper today.  I have three issues of concern with the four jack point.

First, with my dually Silverado, while it can carry the camper well without modification, the camper is not set up for a dually.  I purchased spacers, but the jack are tripod jacks and the only way I can used these jacks is to chain the tripod together making into a pole.

Second, my pickup bed is really high and the jacks are not long enough, so I have had to use lumber spacers to get the height I need--a cheesy operation.

Third, the aft port side jack is rotten out.  I think it will be easy enough to repair that corner.  It does make me think the jack points are inadequate.


Modern electric jacks don't have tripod bases for stability.  Instead the brackets are more vertical.  So my plan is to repair the jack points back to the original configuration, and then add an adapter plate made out of aluminum that would be secured to the frame of the camper higher up.  I also want to use modern swing out dually brackets.  So I suppose the next step is to buy some swing out brackets and then test fit them and figure out how to tie it all together. Then I can figure out how to reinforce the corner higher up.

There are U-channel aluminum extrusions facing each other which would make it difficult to insert one piece of wood.  My options would most likely be to cut a slot in the C-channel farther up and slide the reinforcing down.  Or I could laminate several smaller pieces in.  All Carlton needs is a sketch of what I want and he can build it for me.

Friday, June 22, 2012

Bare Walls

Here are a few photos of the stripped out interior.  I should probably go back and take some detailed measurements so I know where I can screw to attach things.


 One of many mouse nests.  There were way more than a dozen of these scattered thoughout the walls.


 Here is the black pipe used to route gas around the camper.  It is fairly heavy.  I think copper tubing would be lighter and better, or prehaps hose.
 I am saving this and might reuse it.  This is the vent and drain.  To the left is the water tank and range hood.
 Better view of the range hood.  The compressor worked for this water tanks, but the shape limits water capacity.  The range hood seems like a cheap grade of stainless steel.  Much is rusted, and it might take some serious polishing to bring it back.  I would prefer to replace it, if I can find one that will fit.  Another option is to make one and I have an old commercial kitchen range hood that could be used for materials.
 Sink from the bottom.  I need to go and get this out of the rain.  The heat broke with a thunder storm. 
 Bottom of the shower pan.  I was disappointed there was not holding tank.  Although it does keep things rather simple. The toilet drain goes straight out the bottom of the camper  There was space for small holding tank, and I expected there to be one. No chance, just some rotten wood framing and more old mouse nesting areas.

 Dinnette window area.
 Looking aft towards starboard corner.
 Marco, my helper.  I can't say enough for what a great worker Marco is.  And he is  good friend as well.  I paid him more than he asked for because he has a good work ethic and didn't let the heat stop him.  I plan to keep him on helping as much as he has time for me.

Here is the view aft towards the door.  The odd shaped aluminum sheets are there to provide a place to put screws.  You can see the tail lights as well.


Looking forward. The two panels that make the bed platform are lose but there are a few screws to be removed on the port side panel.

A pile of inner window trim molding on the port wing.

Now this is interesting.  The floor was framed, and then this side panel was attached though the floor.  I will have to remove two  ladder frame sections to remove the plywood and then reattach the aluminum ladders.  Worst the screws seem stripped.  I wanted to get this plywood out today and decided to wait on it.

This is the shower surround.  I grabbed a flat bar to pry this out and did not need it.  It was all rotten and broke right out.  No wonder the shower walls were so loose.  There was nothing holding them on.


This shows the whole corner.  My plan is to replace any rot prone wood with solid laminated fiberglass--which is indestructible. I may also install four small drains, one in each corner of the floor to provide a way for the water to get out.